

5 Tips for How to Achieve the Perfect Deck Stain
A simple change of deck color can make all the difference, so how do you get that perfect shade? Here are 5 tips to achieve that perfect deck stain that’ll have your deck looking it’s absolute best in no time!
Has the deck attached to your home seen better days?
Over the years, decks can be exposed to all kinds of weather. It can wear them down and cause them to look lifeless.
You can completely transform a weathered deck by adding a new deck stain to it. Deck stain will put the color back into your deck and, in most cases, it’ll make it look like new again. You might not even recognize it as your deck once the stain has dried.
But before you start staining your deck, you should make sure you know what you’re doing. By taking the right steps, you can do deck staining properly and ensure that your deck looks great for many years to come.
Take a look at 5 tips for achieving the perfect deck stain below.
1. Check the Weather Before You Do Deck Staining
Planning out the right time to stain a deck can be a bit of a logistical nightmare. You really have to plan ahead and create the right conditions for your deck stain to dry properly once you apply it.
If you attempt to apply stain to a wet deck, the stain is likely going to crack and peel quickly once it dries. The moisture won’t allow for your wooden deck to absorb the stain.
For that reason, you obviously don’t want to stain a deck on a day that’s it raining. But you also want to make sure that it hasn’t rained for a couple days prior to staining to ensure that no moisture exists in any of your wooden deck’s layers.
Additionally, you want to make sure that it’s not going to rain for at least two days after your deck has been stained. That will prevent the stain from getting washed away. You also want to steer clear of staining a deck during a particularly humid period of time.
The goal is to find a four- or five-day stretch where the weather will be dry and in the 50 to 90 degree Fahrenheit range. That will allow you to stain your deck without any problems.
2. Clean Your Deck and Prepare the Surface for Your Deck Stain
In addition to finding the right time to do deck staining, you also need to give yourself enough time to prepare the surface of your deck for your stain.
To do this, you should:
- Sweep dirt, dust, leaves, and other debris off your deck
- Consider power washing your deck to get it as clean as it can possibly be
- Sand down any portions of your deck that have splintered
- Use a putty knife to deep clean between the individual boards that make up your deck
The goal during this part of the process should be to get your deck 100 percent clean by any means necessary.
If you apply deck stain over a dirty deck, it won’t be able to coat some of your deck boards. As a result, you won’t get a nice even stain. You’ll have patches on your deck that don’t have stain on them.
By cleaning your deck yourself or hiring someone to do it for you, you will guarantee that your deck is clean and ready to absorb stain.
3. Choose the Right Stain for Your Specific Deck
Once your deck is ready for staining, it’ll be time to start applying your deck stain to it. But before you can do that, you’ll obviously need to have a stain picked out.
This is the toughest part of the process for some people because they struggle to choose from all of the stains that are out there. There are water-based stains and oil-based stains as well as stains in all different kinds of colors.
You should take your time and find the stain that you like best. It should complement the rest of your home and provide you with the look and feel that you love most.
You might want to test a few stains out to see which one you like once it has dried. You can purchase a couple of cheap wooden boards and stain them with a few of the stains that you’re thinking about applying.
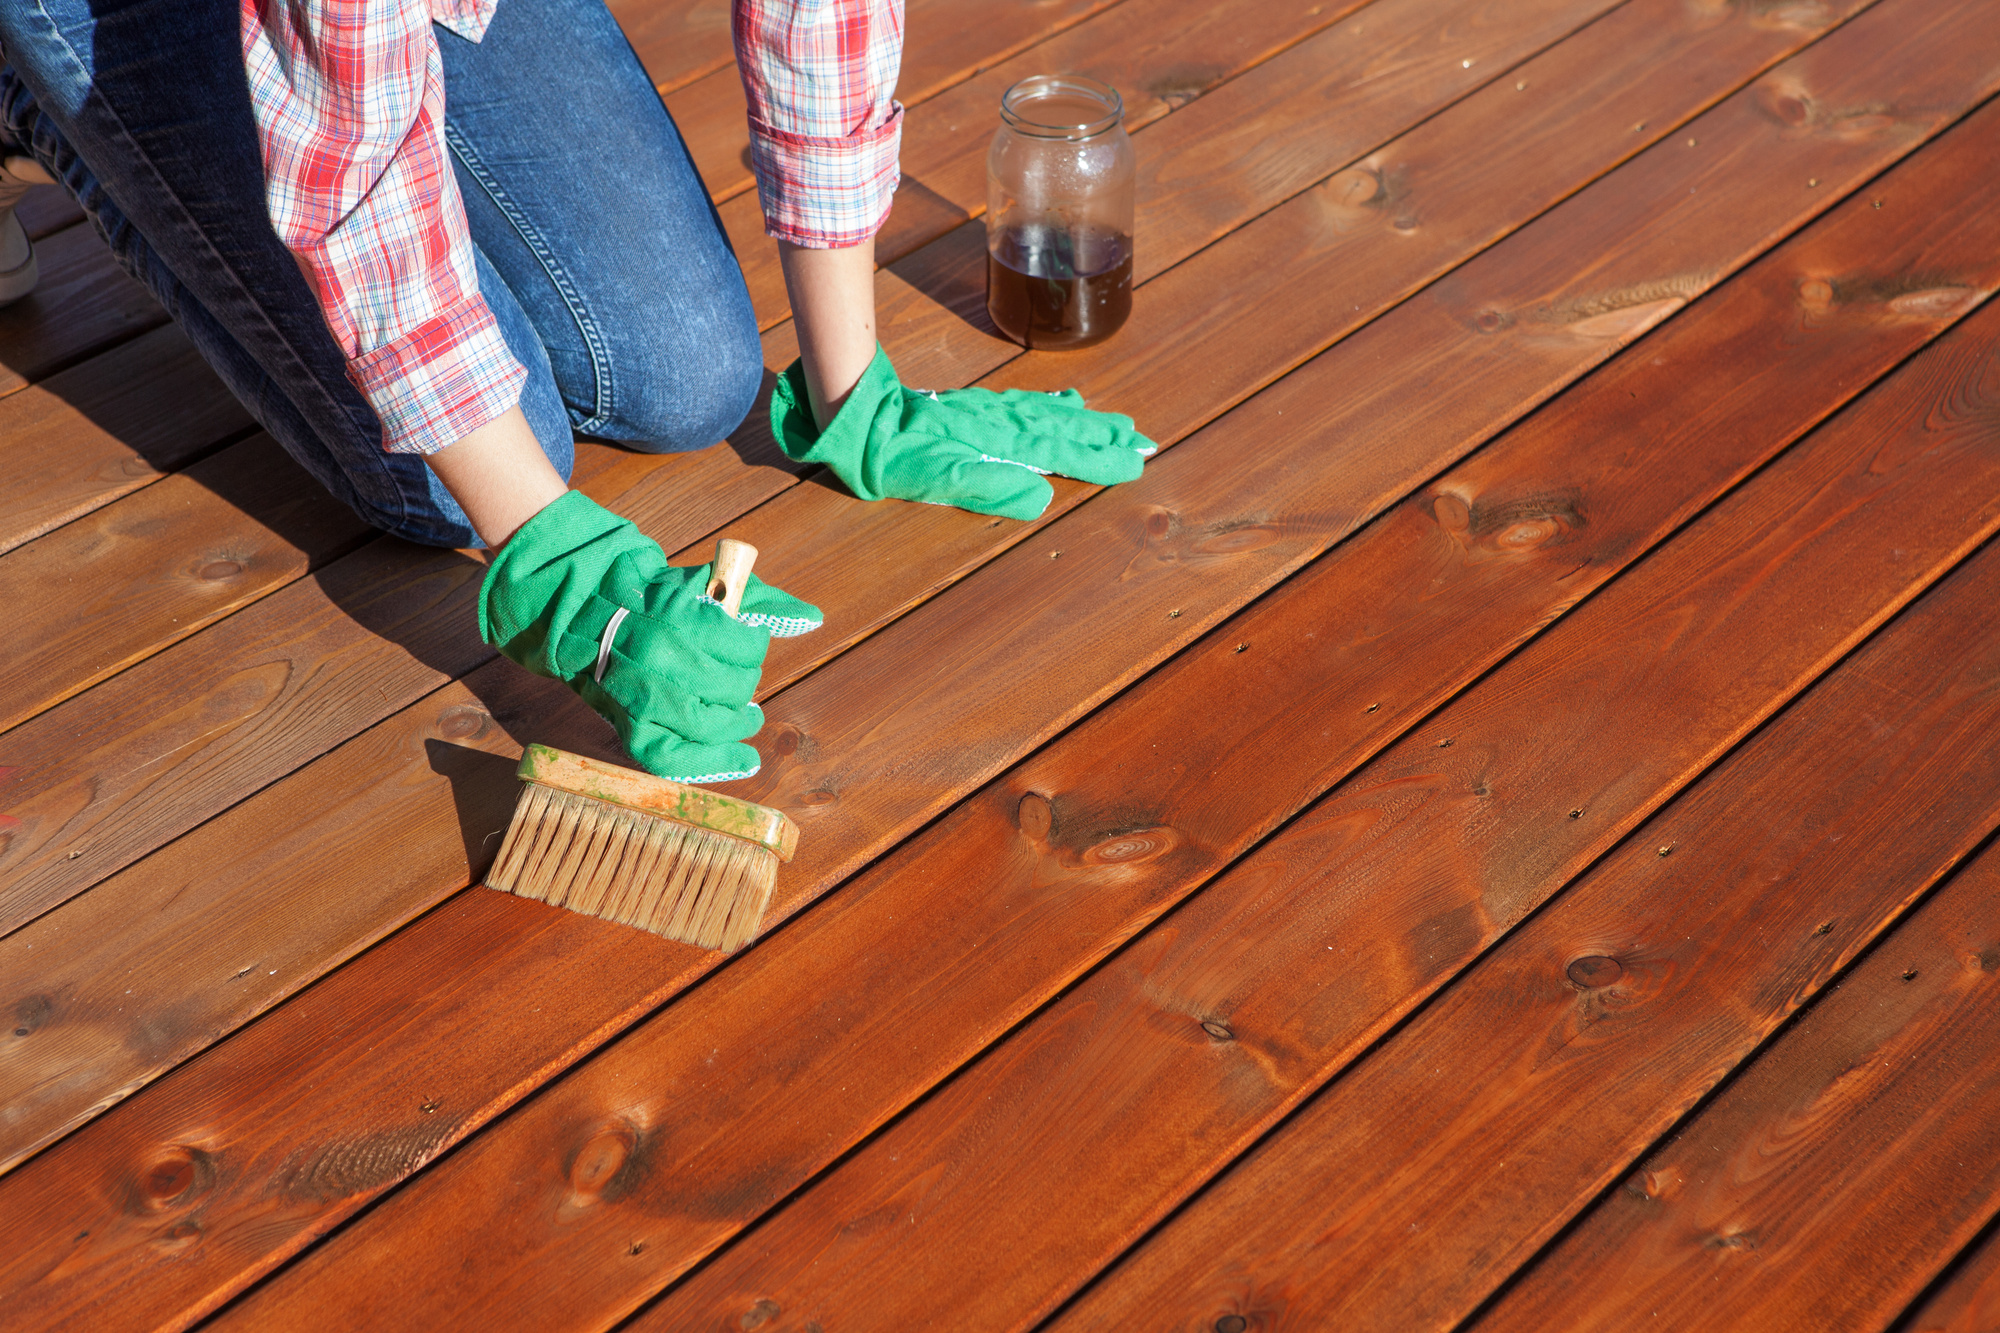
4. Utilize the Right Equipment During Deck Staining
Outside of buying the stain you want to apply, you’ll also have to purchase a couple pieces of equipment to start staining your deck.
You’ll need to buy either brushes or rollers that can be used to put your stain down.
If you’re going with a water-based stain, it’s usually best to use synthetic brushes that will make it easy to apply your stain.
It’s also best to use rollers that have a nap that is either 1/4-inch long or shorter. It will allow you to apply thin layers of stain to your deck.
5. Apply Your Deck Stain in Very Thin Layers
When you begin applying stain to your deck, you want to do it in very thin layers.
This will prevent the stain from pooling on the surface of the deck and sitting there instead of working its way down into your deck. When that happens, your stain will often chip and peel off easily later, which will obviously not be good.
You should typically try and apply two thin coats to your deck to get an even stain on it overall. While one layer might do the trick, the second coat will ensure that you hit every single spot and leave a stain behind.
Whatever you do, don’t rush through the job and try and slap stain on quickly. It’ll often result in a messy job that will leave your deck leaving even worse than it did before.
Transform Your Deck by Adding Deck Stain to It Today
It’s pretty amazing what some simple deck stain can do for a deck. It can take something that looks old and ugly and turns it into something you’ll actually want to use on a regular basis.
You can transform your old deck in a matter of just a few days. As long as you follow the tips listed here, you’ll have no problem bringing your decking back to life.
Read our blog for more tips that will help you in all different areas of your life.