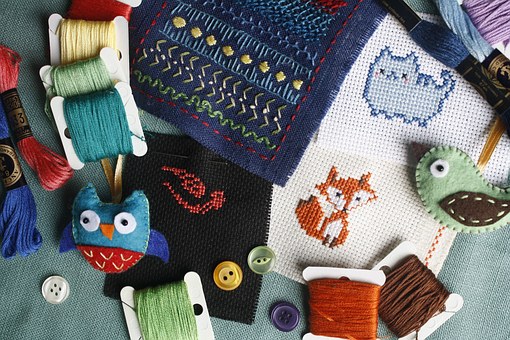
A simple way to make a jacket, a shirt, or a pair of trousers look out of the ordinary is to apply a patch on them. The patch can be applied by sewing or ironing on any textile backing, such as clothing, footwear, bags, backpacks or school bags, decorative items. Depending on the size of the support to be decorated, you can choose one or more embroideries you can find at sites like https://www.thecheapplace.com/. The support should be smooth, dry and textile in the application area.
How to apply the patch with an iron
Place the pieces to be used to give you an idea of how the object will look after the application. Heat an iron with the thermostat set to a maximum of 150 – 160 degrees Celsius (not to be extremely hot). Cover with a protective cotton cloth cover with the labels placed in position. If you apply the labels to a purse, satchel, or racks containing other materials than the textile, try to put it on the ironing board or at the end of the ironing table, only the textile application area, so that the iron heat does not damage the other materials from which it is composed.
Calculate the application area by pressing well and moving the iron so that the heat spreads evenly over all the patches. Raise the ironing machine, remove the protective cloth, and leave it to cool without moving it and without testing the degree of soldering (you can risk loosening them if you pull them while they are still warm). After cooling, the object is ready-made and can be used! For patches to be used in wet environments or to be washed at the washing machine at temperatures above 40 degrees Celsius, you can secure them by sewing. This is in a nutshell how to do it. Below, you’ll read more about the history of this craft.

Special techniques
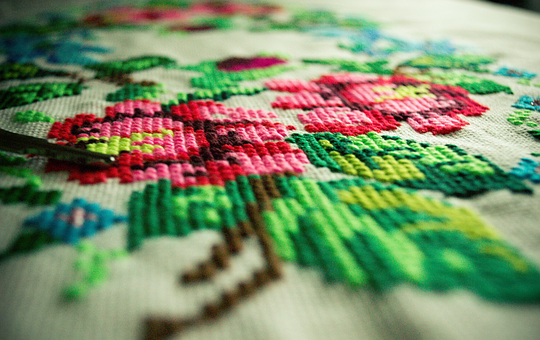
Embroidery is an art that decorates or personalizes a wide variety of garments and other textiles with various uses. See more here.
Many years ago, this art was handcrafted; women were engaged in this old-fashioned “tradition” they had learned from an early age. After a while, they began to use a simple sewing machine for embroidery, but the movement of the embroidery was done manually, following the drawings on the material.
The technique has progressed in the meantime, bringing current computer embroidery and with this a unique and small secret technique that makes embroidery the most appreciated method of personalizing and embellishing textiles. Embroidery is valuable, and with a significant visual impact, it brings a special light and shine to those products (mainly when we use high-quality embroidery threads), but the most important thing is that the embroidery has a very long life, it does not deteriorate over time due to repeated washing or other external factors.
Types of materials
First of all, you need an embroidery thread, which is of several kinds: Viscose, polyester, metallic, cotton, acrylic, bobbin thread. Depending on the embroidery material and the desired embroidery appearance, the type of needle is chosen. For example, for embroidery that comes in direct contact with the skin (baby clothes), luxury embroidery (gowns, bridal gowns) and other embroidery made on delicate fabrics we will choose the viscose, which is more elegant and shinier. However, it does not resist bleaching (chlorine) because the original thread is produced in one color and then painted in a wide variety of shades (including gradient or multicolor.
Check this out: https://www.thesprucecrafts.com/embroidery-4162905
Polyester is generally used for outdoor textiles (gloves, trousers, caps, protective equipment) because it is resistant to discoloration or other stain removal solutions.
The metallic thread is used primarily for the embroidery of church textiles (priestesses, icons, banners) but not only for them. For embroidery with matte or combined with other decorative applications, we use the cotton embroidery thread, this being thicker and requiring the use of appropriate thickness needles.
The particular acrylic shell (100%) is thicker and is used for embroidery on knitwear and lush fabrics, resulting in a look similar to hand embroidery (looks like wool). Also, in this case, the thickness of the embroidery needles must be adjusted. Other types of embroidery threads produce special effects such as reflective fleece, fluorescent yarns, blade threads, solar wires (sensitive to UV light, in contact with it, and various colors, ideal for embroidering bridal gowns). The transition from dark to natural light is made by instantly coloring gorgeous pastel shade. For tiny lettering, use the thinner polyester yarn (thickness 60) and the shortest needle (60) needles, in which case the resulting embroidery is very clear.
The embroidery threads
The embroidery thread is available in cones of various sizes, usually 1000 m, 2000 m or 5000 m and in several thicknesses of the different thread (60/40/30/12 – the number decreases as the width of the yarn grows), depending on the category the yarn and the company that makes it.
You will find various prices at the manufacturers, but our recommendation is to choose the best quality, even if it is more expensive, the cost of the garment representing an insignificant part of the cost of embroidery.
The embroidery fabric is the insert or reinforcement as it is called, similar in appearance to a more porous paper and placed under the embroidery material, attaching it to the embroidery frame. This is found in various thickness variations, the most common ones being 20/40/50/80 g / m2 and in two colors – black and white.
The thickness and color of the insert are adapted to the type of material that we have to embroider. Solidification of the material insert can be done in two ways: either by sticking with temporary spray for embroidery – picture 11 or by ironing, if we use IBN with thermo-adhesive layers (which is obviously more expensive). The two procedures are similar in terms of cost and productivity, but only when using the spray, it is advisable to have a particular embroidery table prepared in the embroidery frame in the immediate vicinity of the embroidery machine (to avoid depositing the solution spray adhesives on machine tools).